


Effort tracking adds a column to every set where you log how hard it felt — either as RPE (Rate of Perceived Exertion) or RIR (Reps in Reserve).
Turn on effort tracking#
- During a workout, tap the gear button to open Workout Settings.
- Under Effort Tracking, choose RPE or RIR.
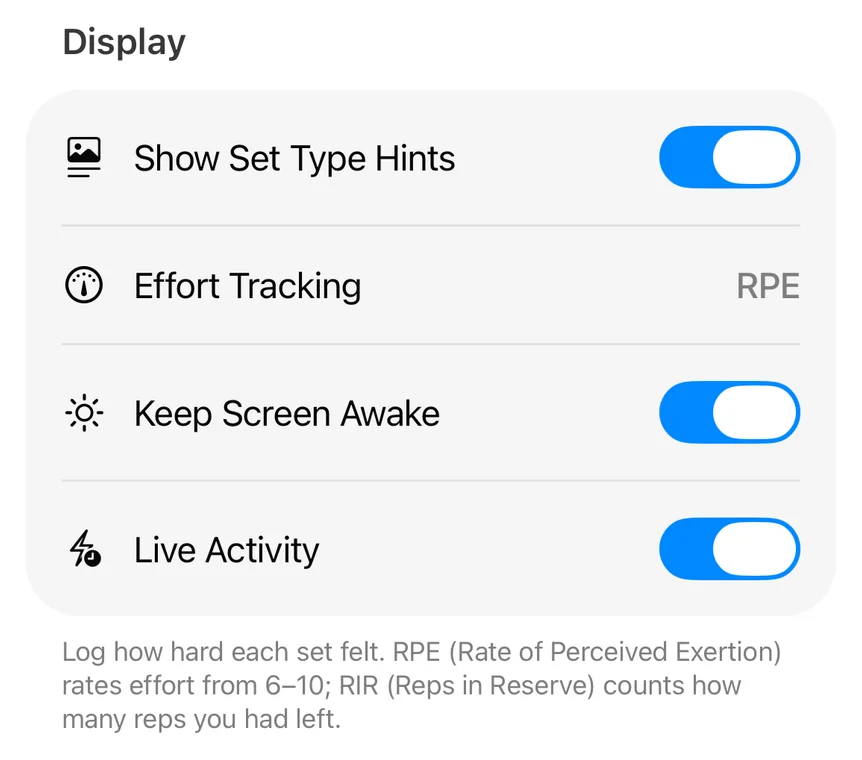
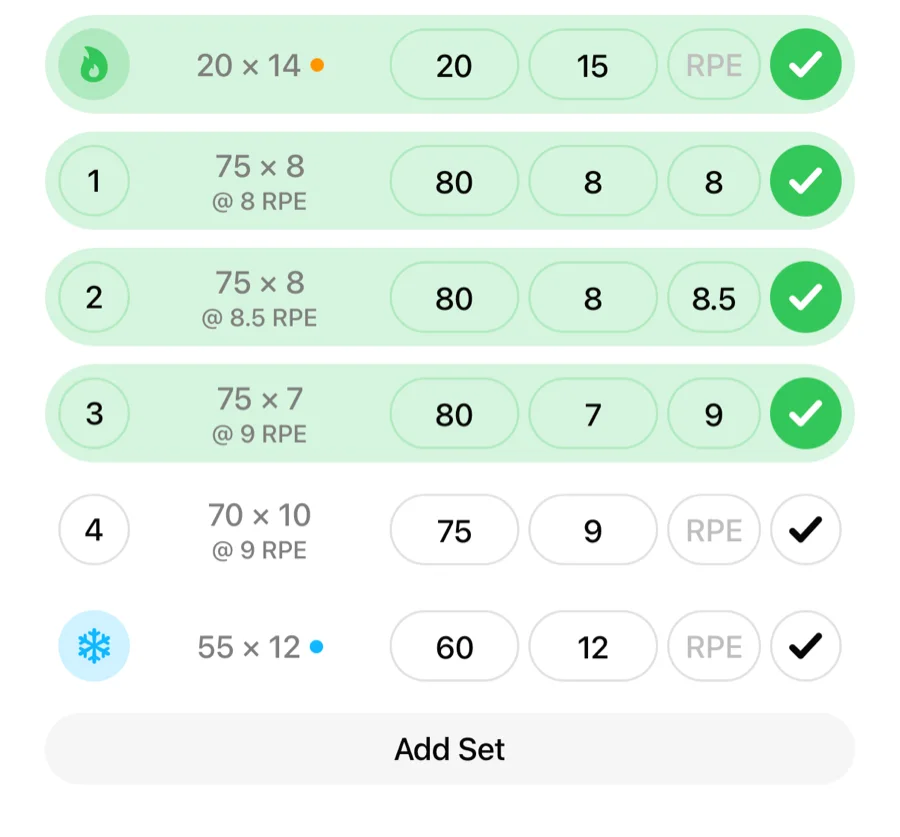
An RPE or RIR column appears on every exercise. Not sure which scale to use? See RPE vs RIR.
Log effort for a set#
- Tap the RPE or RIR field on a set.
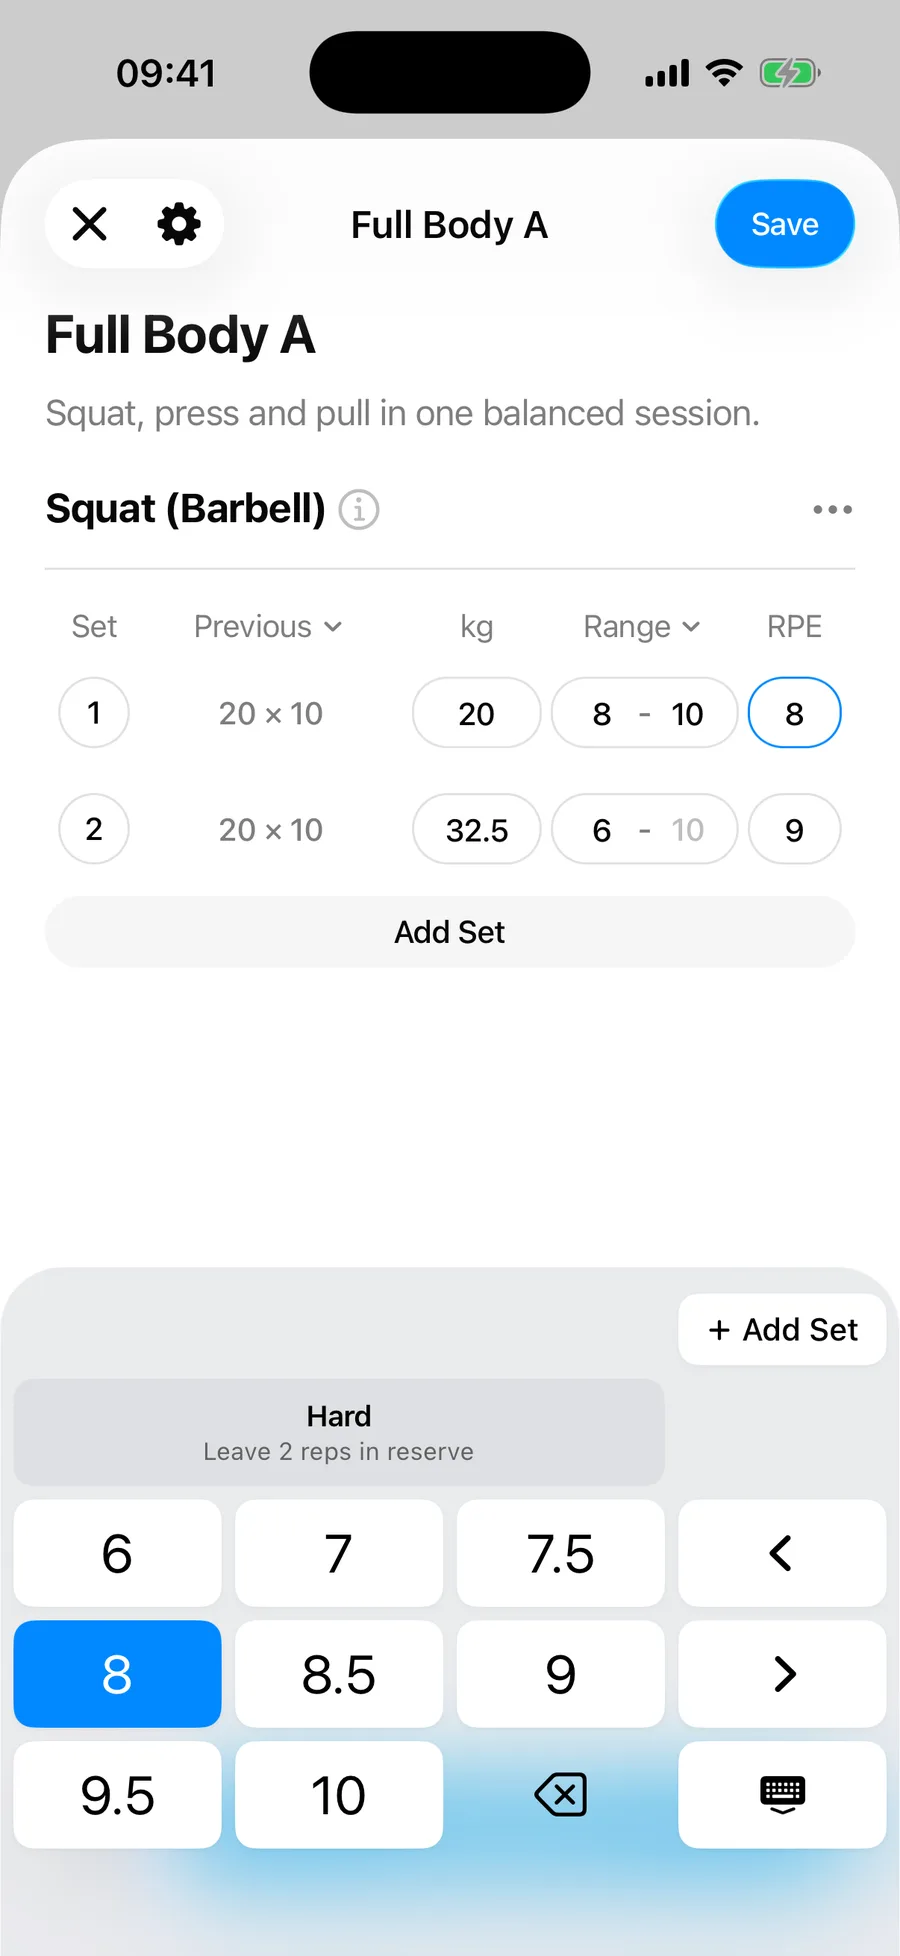
- Pick a value from the quick-pick grid on the workout keyboard. Each value shows a plain-language description — for example, RPE 8 is "Hard — could do 2 more reps."
Plan effort targets in routines#
With effort tracking on, the same RPE or RIR column appears in the routine editor, phrased as a target — "How hard should this set be?" instead of "How hard was this set?". Program something like 3 sets of 8 at RIR 2, and the target shows on every set when you run the routine.
Turning it off#
Set Effort Tracking to Off in Workout Settings. Previously logged values stay in your history.