


Logging a workout in Gript takes four steps: start, add exercises, log sets, finish. Here is the full walkthrough.
1. Start a workout#
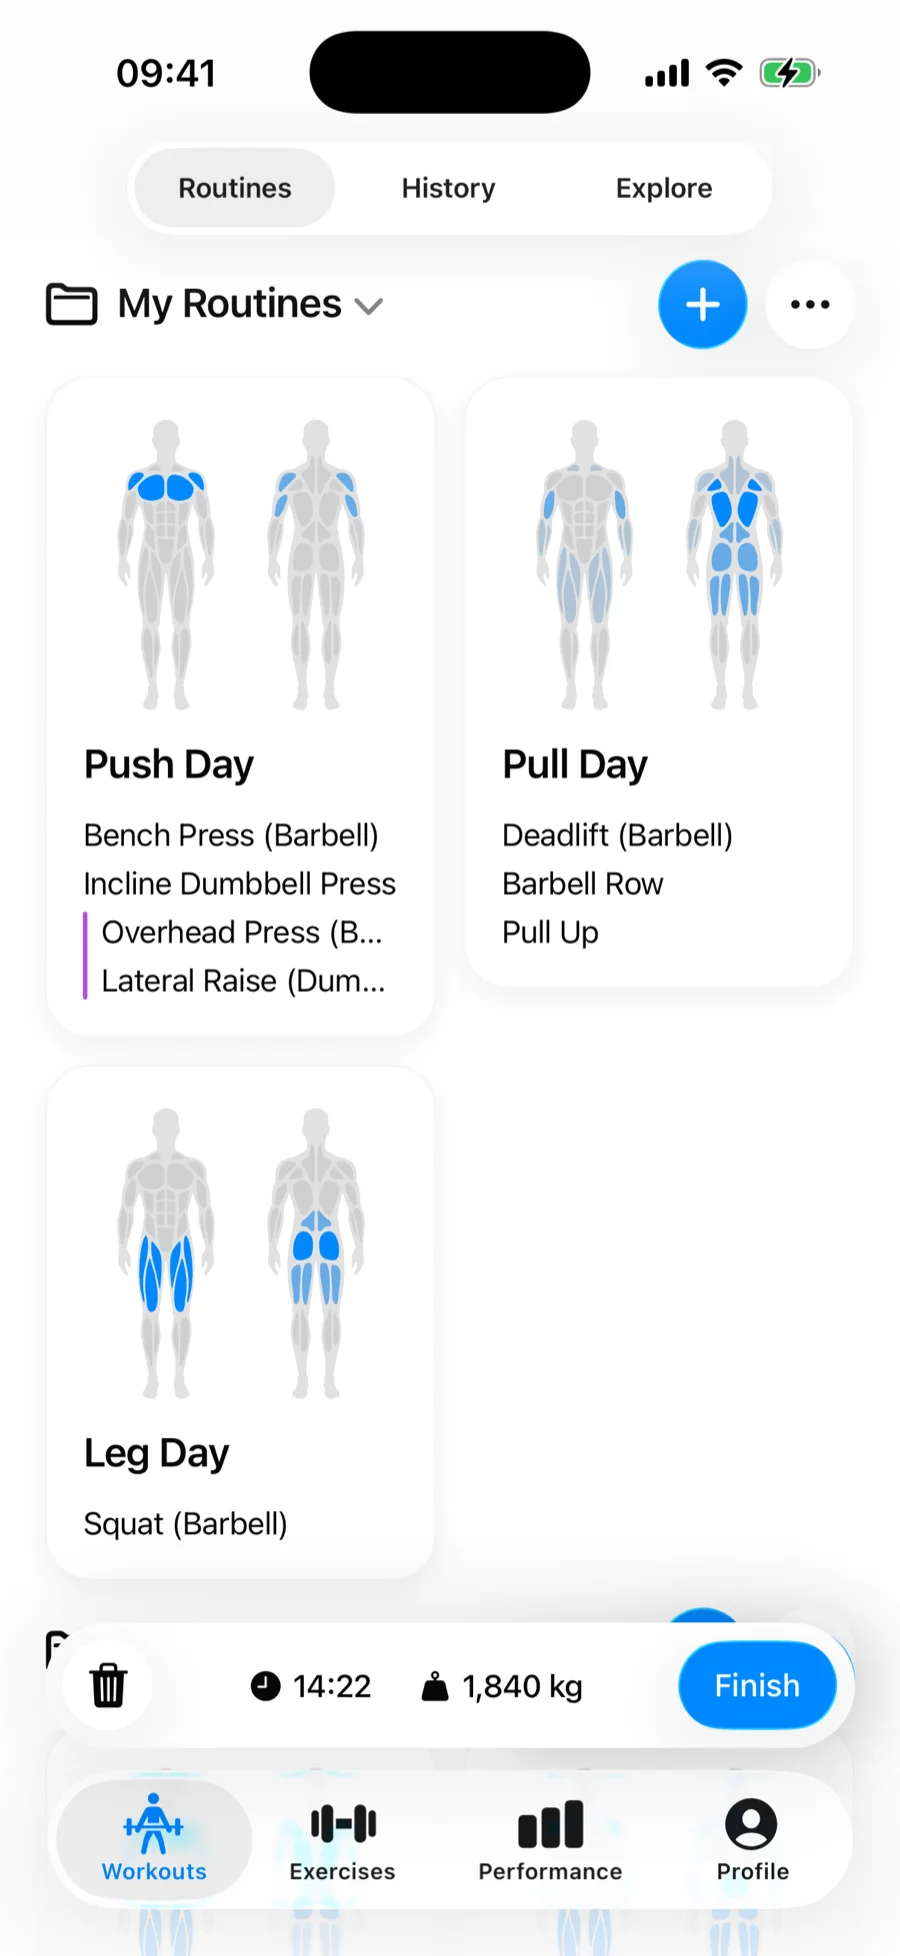
Open the Workouts tab and tap the Start Workout button in the bottom-right corner. This creates an empty workout — no plan required.
On a brand-new account the tab shows a starting point instead of routines: Start Empty Workout does the same thing, while Create Routine builds a reusable routine first and Explore Library opens the library of ready-made programs and routines. Once you have routines, tapping one and starting it works too.
2. Add exercises#
Tap Add Exercises and pick from the library. Your most-used exercises sit under Frequent; otherwise search by name (the search button is in the bottom bar, right next to the add button) or filter by muscle group and exercise type. Select one or several, then confirm — the add button stays reachable above the keyboard while you type.
3. Log your sets#
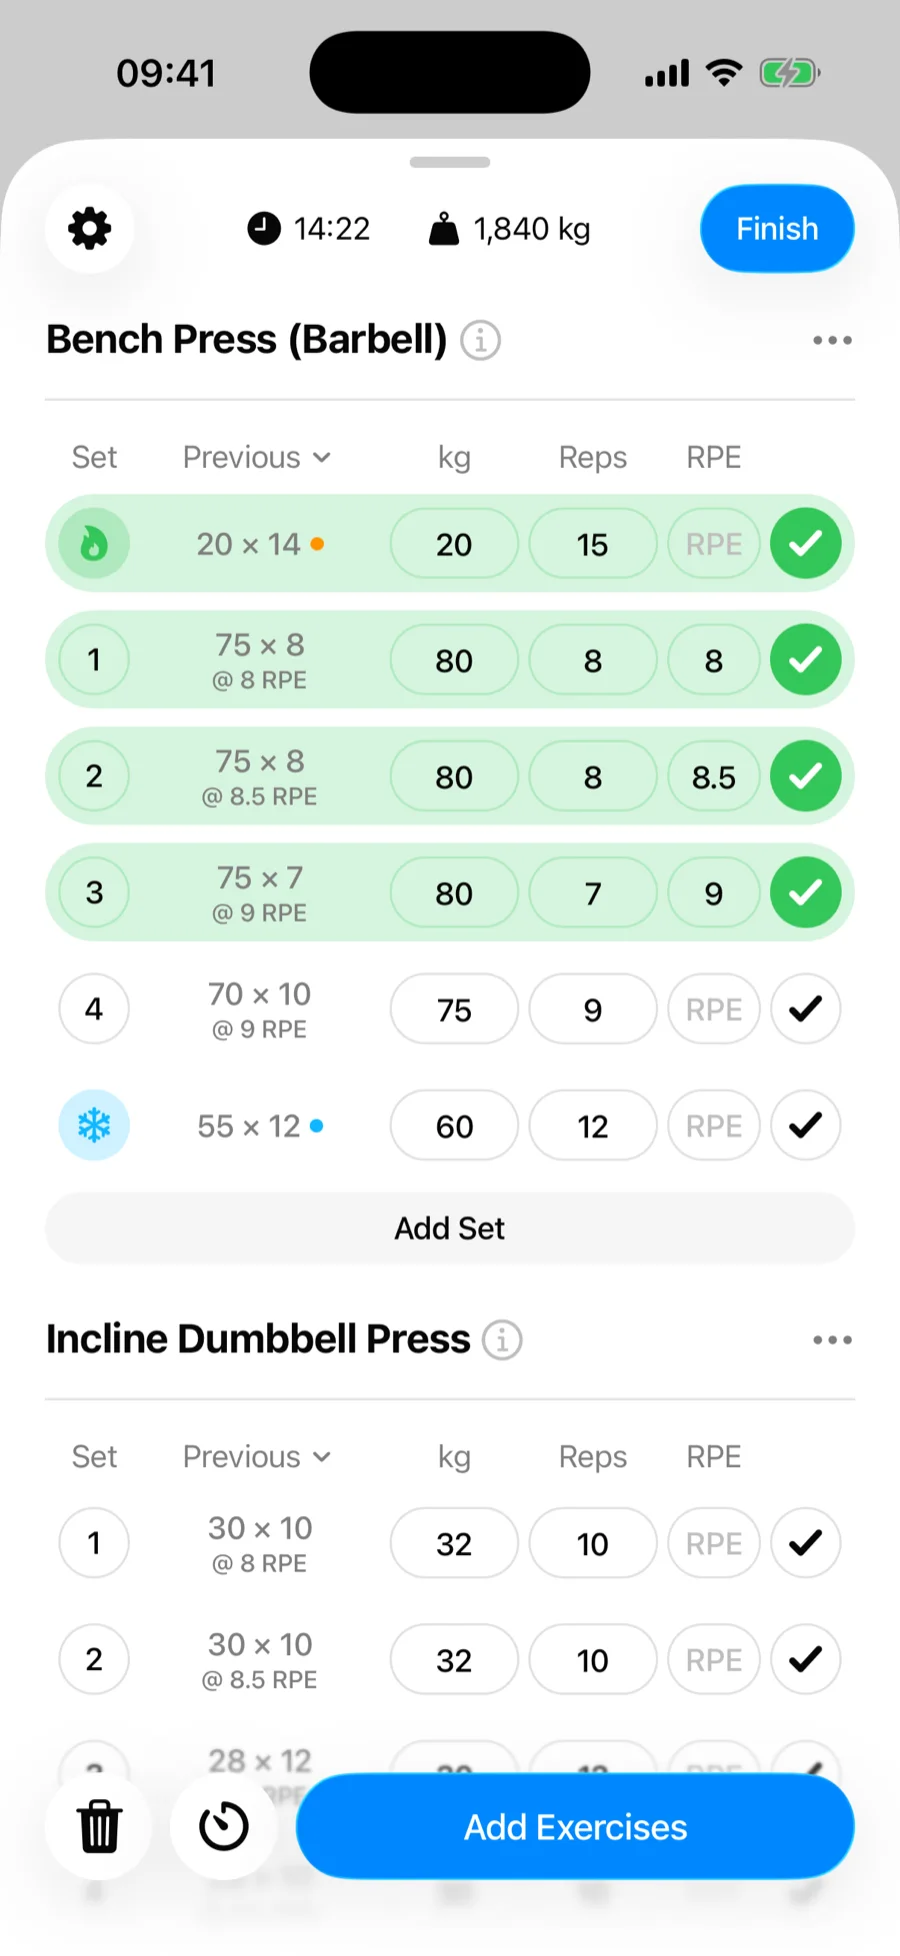
- Each exercise starts with an empty set row. Tap the weight field and enter what you lifted.
- Enter your reps.
- Tap the checkmark to complete the set — this is what saves it and starts the rest timer.
- Tap Add Set for the next set, or move on to another exercise. Planning a 5×5? Press and hold Add Set to add two to five sets in one go.
The Previous column shows what you did last time for each set, so progressive overload is always one glance away. Tap its header to show your best, estimated 1RM, or any of your last five sessions instead.
4. Finish#
Tap Finish in the top corner. The completion screen shows a card with every exercise and its best set, any personal records you just set, and your duration, sets, and total volume. Tap the workout name on the card to rename it, and share the workout if you like. The workout is saved under History on the Workouts tab, grouped by month with the workout count and volume lifted in each month header, with a trophy count on workouts that set records. Open it there to edit it later if needed.
Uncompleted sets#
If you finish with sets you never checked off, Gript asks whether to Log All Sets or discard the unlogged ones. Only completed sets count toward your history and charts.
Pausing a workout#
Interrupted mid-session? Tap the pause button next to the rest timer in the workout footer. The screen dims under a Workout paused banner, the elapsed time freezes, and the Live Activity and Apple Watch show the same paused state. Tap Resume — on the phone, the lock screen, or the watch — to carry on. Paused time is left out of the workout's duration, while its start and end times stay as they were.